Knitting with Knitout Part Two: The Front and Back of Things
Welcome back to the Knitting with Knitout series! For this second tutorial, we'll be making a swatch of 1x1 ribbing, a particularly stretchy fabric that's often used for cuffs and edges where some stretch is appreciated. To do this, we'll be learning about the two different kind of stitches in knitting and how we can form them on a knitting machine. Forward and onward, dear readers!
Front Knits vs Back Knits
As explained in post one, stitches are formed by pulling loops of yarn through the center of exisiting loops, thus making stable stitches that will not unravel. When pulling the the new loops through the existing loops, there are two main ways to do so: either the new loop can be pulled from the back of loop through to its front (seen in magenta below) or it can be pulled from the front to the back (seen in cyan). We call these front knits and back knits respectively.

Those of you with existing knitting experience might be thinking, 'Wait, this back knit looks suspiciously like a purl stitch…' And you'd be right! They're exactly the same! What's more, what we call a front knit is the same as a knit stitch. However, we think the terms front knit and back knit help with understanding certain points about knitting, primarily that front knits and back knits are essentially the same stitch. If you make a front knit by pulling the yarn through from the back to the front, you have a front stitch, where the new loop is in front of the old loop. And indeed, if you rotate the stitch to look at it from the other side, the new loop is now behind the old. Meanwhile, if a person had been standing across from you and looking at the same stitch, they would have seen the opposite: the yarn moved from the front to the back to make a back knit, and after the rotation, they'd see a back knit. In the end, as their names might suggest, front and back knits are just two sides of the same knit!1
Front Beds and Back Beds
The knitting machine has two beds, a front bed and a back bed. The front bed and the back bed have needles pointing toward each other, and the yarn carrier move in between the the beds. In the first blog post, we introduced that as the yarn carrier moves past a needle, the needle can tuck and knit. In the following illustration we can see that when we face the needle, the new loop is always pulled from the front to the back of the old loop, thus forming a back knit.

Now let's think about the two beds of the knitting machine. When we face the knitting machine, we have the back bed with needles pointing toward us and the front bed with needles pointing away from us. Thus all knit operation done on the back bed have new loops pulled from the front to the back of the old loop, forming back knits. And all knits done on the front bed have new loops pulled from the back to the front of old loops, forming front knits. Front knits are made on the front bed, and back knits are made on the back bed. How convenient!
In the first blog post, we only used needles from the front bed. Now, in order to get both front and back knits in one swatch, we use both the front and back beds. In the figure below, we first alternate between tucking on the front and back beds. Then we knit on the needles that we tucked before. The loops with lighter colors are the old stitches, and the loops with darker colors are the new stitches. After three knit operations on each needle, we will get the rib figure we showed above.


Ribbing Knitout (With Some Javascript)
From this tutorial onwards, we'll be using a small javascript package to write our knitout code. At the time of this writing, the linked github repository is private, but if you ask we'll provide access. The knitout javascipt package is nice because it has some simple built-in checks, and it automates things like the required header, but for those who wish to avoid javascript, using the logic in these tutorials to write knitout from the language of your choice is very straightforward so long as you remember the knitout language specifications. For this post we'll go over the nitty gritty of using the package in addition to the ribbing logic, but future posts will skip this to focus on the technique being taught.
Our first step is to import the knitout package into our project and instantiate it so we can use it. When you create a Writer you are required to supply a "carriers" list in the options
Note that the following code assumes the knitoutWriter.js script is in the same folder as the script you're writing, but of course you can place the file elsewhere and adjust the file location accordingly.
var knitout = require('knitout');
k = new knitout.Writer({carriers:['1', '2', '3', '4', '5', '6', '7', '8']});
Next, we can add the headers to our knitoutWriter object. The required knitout version header is generated automatically, and we can also specify the machine and gauge being used, as can be seen in the following code:
k.addHeader('Machine','SWGXYZ');
k.addHeader('Gauge','15');
Then we'll want to define our swatch and carrier variables. We only mentioned carrier 6 in our header, so we'll have to assign that to our carrier variable. We'll have our swatch size be 20 columns by 40 rows, which is just skirting the edge of too small to reliably find in the machine.
var height = 40;
var width = 20;
var carrier = '6';
We can use modulo arithmetic to determine whether a particular stitch belongs on the front bed or back bed: just say that if the current needle number modulo 2 is 0, a stitch belongs on the front bed, otherwise it belongs on the back. However, it turns out the Shima Seiki SWG-N2 throws a small complaint if the very first stitch it tucks is on the back bed and not the front. We could ignore this complaint or hard code in the logic for our known swatch width of 20, but we might as well take the extra step to ensure that for any width, the very first stitch will be on the front bed:
var front = width%2;Now we're ready to perform our cast on. As always, we start by bringing in the yarn with
k.inhook(carrier);

for (var s=width; s>0; s--) {
    if(s%2==front) {
        k.tuck("-", "f"+s, carrier);
    }
    else {
        k.tuck("-", "b"+s, carrier);
    }
}
Notice that while in the flat stockinette example we had to skip every other stitch when casting on and then turn around to avoid draping yarn along the top of needles in an unstable configuration, we don't do that in this 1x1 rib case. That's because the yarn alternates between the front and back bed every other stitch, which is enough to keep the yarn secure on each needle.
We now need to turn around and knit the stitches we cast on. However, there is one thing we need to be careful of with this and all future cast ons. It turns out that if we try to knit a stitch we just tucked, we'll get an unstable configuration and end up dropping the stitch. This is because the carrier tries to maintain some tension on the yarn, and by turning around and immediately trying to knit a tucked stitch, which is just a yarn draped over a needle, the yarn will get pulled off the needle by the carrier. We can see this problem illustrated in the following figure.

In our 1x1 rib example, we can just skip the needle we just tucked and start our for loop from needle 2. Other cast ons require other strategies, and we'll include them in our examples for future tutorials. But as a little exercise, you can try and think of ways to use a for loop to write the alternating tuck cast on used in tutorial one without knitting a stitch that was just tucked.
for (var s=2; s<=width; s++) {
    if (s%2==front) {
        k.knit("+", "f"+s, carrier);
    }
    else {
        k.knit("+", "b"+s, carrier);
    }
}
With that, our cast on is done and we can start ribbing. This is as simple as telling the inserting hook to release the yarn and knitting all the stitches on the appropriate needle until we reach the appropriate height. Since each positive and negative pass of the carrier is one row of knitting, I like using a while loop and increments for my swatch height.
k.releasehook(carrier);

var current_height = 0;

while (current_height < height) {
    for (var s=width; s>0; s--) {
        if (s%2==front) {
            k.knit("-", "f"+s, carrier);
        }
        else {
            k.knit("-", "b"+s, carrier);
        }
    }
    current_height++;

    for (var s=1; s<=width; s++) {
        if (s%2==front) {
            k.knit("+", "f"+s, carrier);
        }
        else {
            k.knit("+", "b"+s, carrier);
        }
    }
    current_height++;
}
Whew, much less tedious than writing individual lines of knitout! With that we can tell the machine that we're done with yarn 6, and we'll have finished all the knitting. The last step is to tell the knitout writer to write our pattern out to a knitout file. I name the knitout file what I name my javascript file and write all knitout files to an output folder, but that's just a personal preference.
k.outhook(carrier);
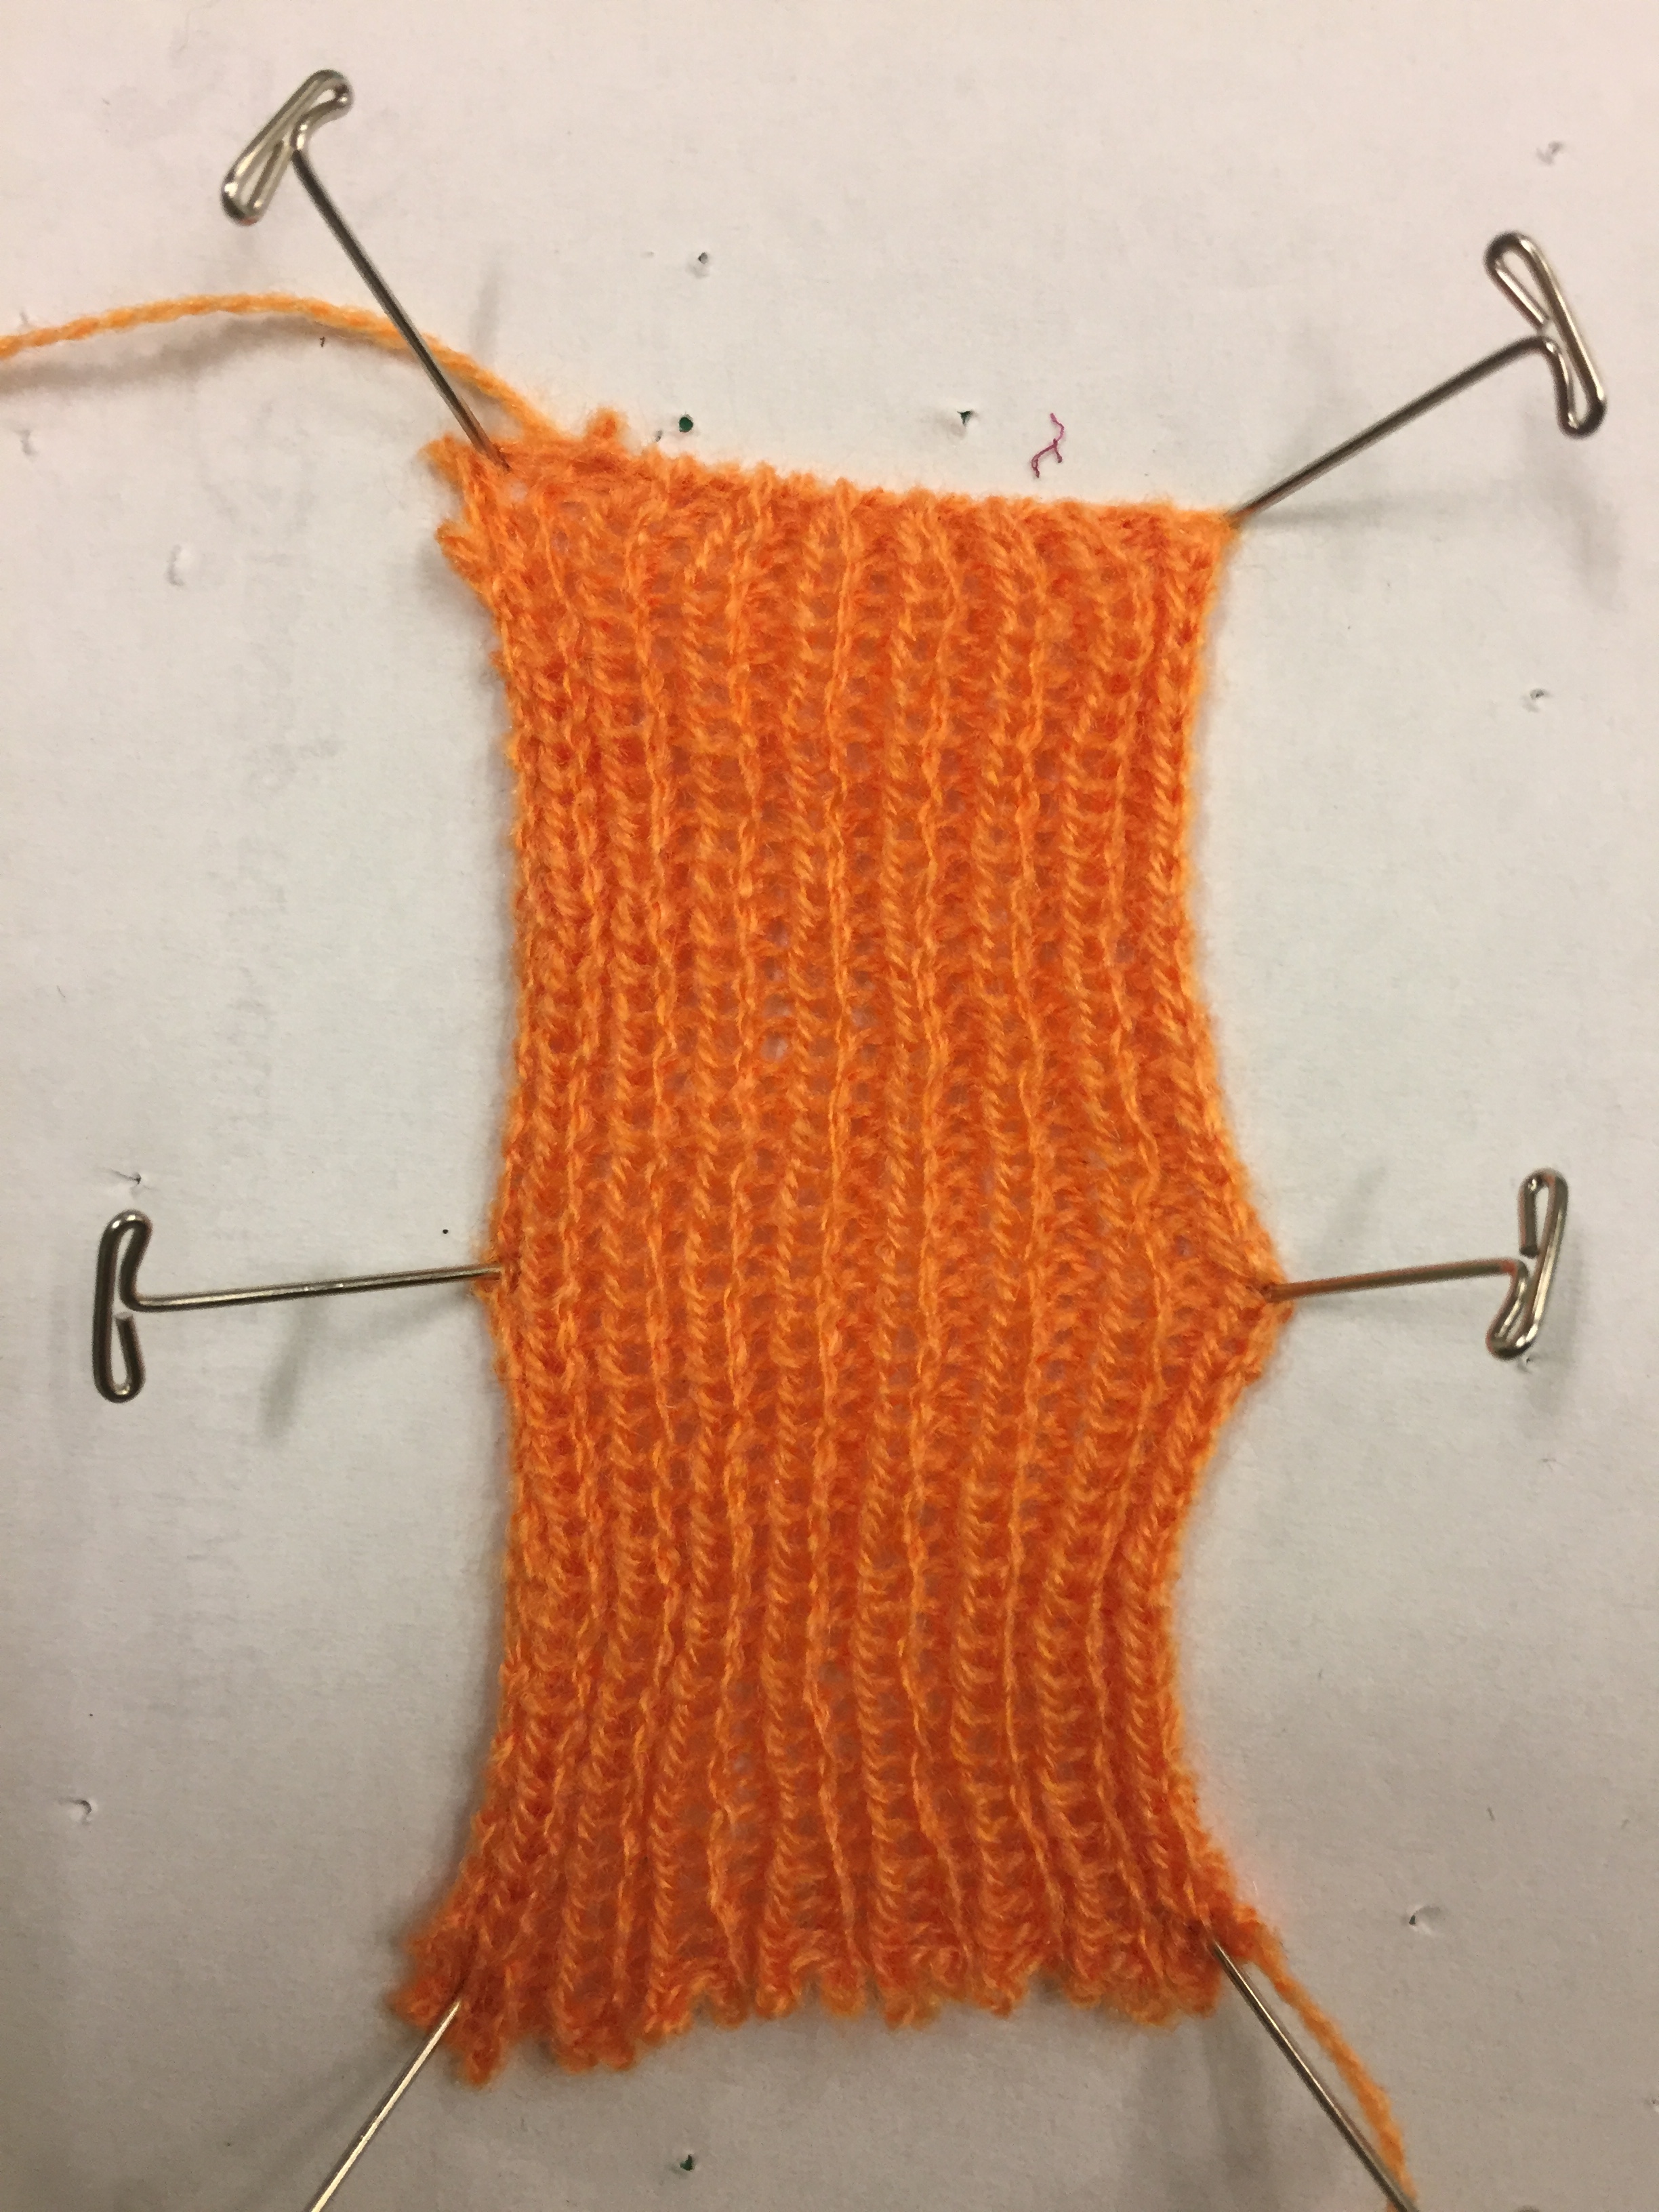
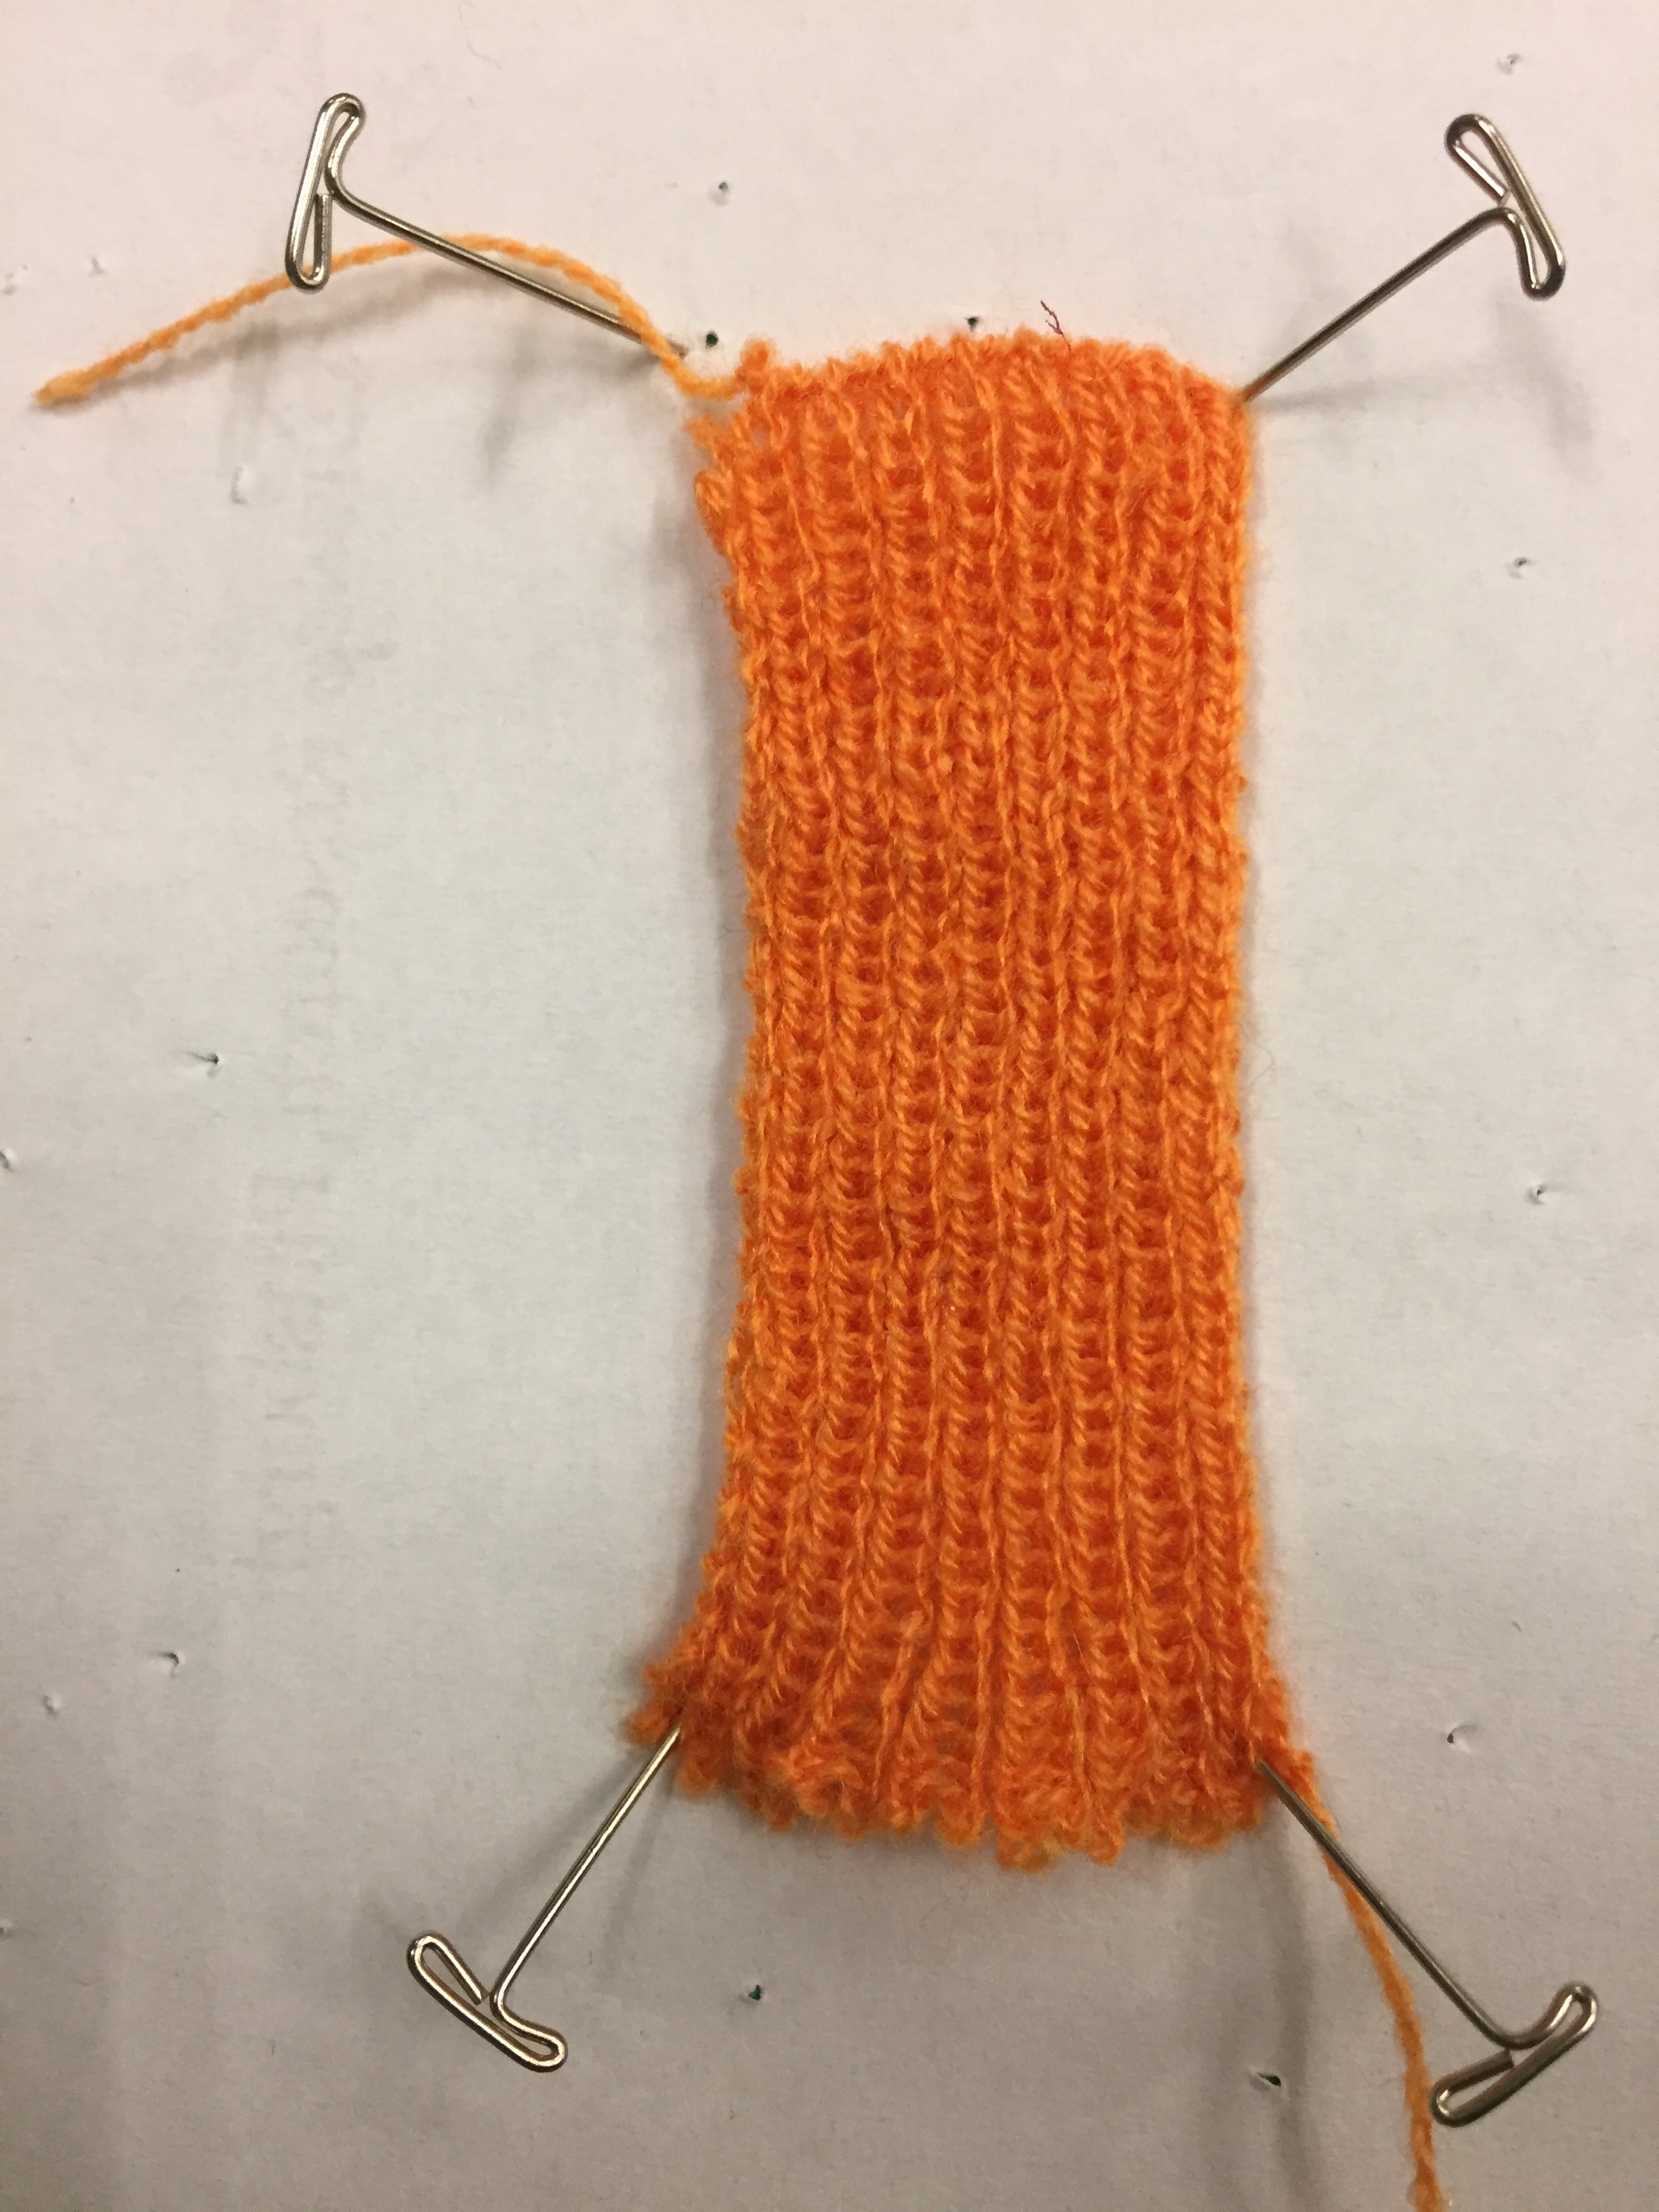
k.write('output/rib1x1.k');And with that, our code is complete! Running your script should produce a knitout file in the location you specified, which you can process using the steps detailed in tutorial one. Running the resulting dat file on the machine will produce a nice rib swatch similar to the one pictured. In the stretched ribbing swatch on the left, we can see that some columns of the stitches (front knits) come forward and some columns of the stitches (back knits) recede. The way front knits and back knits want to lie is different when no tension is applied; the swatch on the right is much narrower width-wise. Different arrangements of front and back knits can result in drastic different shapings in the final fabric. There's a whole host of interesting stitch patterns that can be made just by combining the two, and we only need one more technique before we can make them all. Until next time!
1. Note that while we'll try to stick with the terms front knit and back knit for this tutorial series, we might slip up on occasion and use knits and purls instead. Since hand knitting doesn't use the terms front knit and back knit, one might say building up this association between terms is a good thing anyways. (Front stitches and back stitches, however, are just a confusing typo due to the world of embroidery. Alas…)↩